|

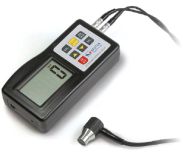
KERN TB-US
|
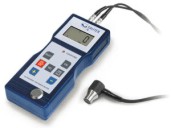
Ultrasonic thickness gauge TB-US
- Auto-Power-Off
- External sensor for better access to the test object (cable length: 1 m)
- Height displayed in mm or inch
- Base plate included
- Delivered in a hard carrying case
- TB 200-0.1 US-red: can only analyse these materials steel, cast iron, aluminum, red copper, brass, zinc, quartz glass, polyethylene, pvc, gray cast iron, nodular cast iron.
- TB 200-0.1 US: every hard material, including steel, cast iron, aluminium, red copper, brass, zinc, quartz, glass, polyethylene, PVC, Gray cast iron, homogeneous plastics, nodular cast iron and other materials.
| Model |
readout |
range |
|
mm |
mm |
| TB 200-0.1US-red |
0.1 |
200 |
| TB 200-0.1US |
0.1 |
200 |
|
 |
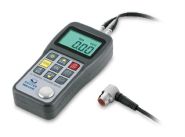
Ultrasonic thickness gauge TD-US
- External sensor for difficult-to-access measurements
- Selectable measuring units: mm, inch
- Data interface RS-232 included
- Base plate for adjustment included
- Delivered in a hard carrying case
| Model |
readout |
range |
|
mm |
mm |
| TD 225-0.1US. |
0.1 |
225 |
|
 |
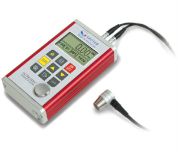
Premium Ultrasonic thickness gauge TU-US
- External sensor for difficult-to-access measurements
- Base plate for adjustment included
- Data interface RS-232
- Delivered in a hard carrying case
- Scan mode (10 measurements per sec.) or single point measuring mode possible
- Internal memory for up to 20 files (with up to 100 values per file)
- Function to set limits, programming of Max./Min., in pull and push direction, with output of audible and optical signal. Ideal mode for efficient and accurate testing of standard parts
- Selectable measuring units: mm, inch
| Model |
readout |
range |
sensor diameter |
|
mm |
mm |
mm |
| TU 80-0.01US. |
0.01 |
80 |
6 |
| TU 230-0.01US. |
0.01 |
230 |
10 |
| TU 300-0.01US. |
0.01 |
300 |
14 |
|
 |
Ultrasonic thickness gauge TN-EE
- Hand-hold thickness gauge using the echo-echo method
- External sensor
- Data interface RS-232, standard
- Delivered in a hard carrying case
- Scan mode (10 measurements per sec.) or single point measuring mode possible
- Internal memory for up to 20 files (with up to 100 values per file)
- Selectable measuring units: mm, inch
- Two measuring modes to determine material thickness: Pulse-echo mode or Echo-echo mode
- Determining the actual thickness of materials regardless of any coating which might be present. In this way, the wall thickness of pipes, for example can be determined in a non-destructive manner, i.e. without having to remove the coating
- Echo-echo measurements are only possible with the measuring head included as part of the delivery (ATU-US12, see accessories)
| Model |
readout |
range |
sensor diameter |
measuring frequency |
|
mm |
mm |
mm |
Mhz |
| TN 30-0.01EE |
0.01 |
3-30 |
12 |
5 |
| TN 60-0.01EE |
0.01 |
3-60 |
12 |
5 |
|
 |
Ultrasonic thickness gauge TN-US
- Hand-hold thickness gauge
- External sensor
- Data interface RS-232, standard (only for models with readout [d] = 0,01 mm)
- Delivered in a hard carrying case
- Scan mode (10 measurements per sec.) or single point measuring mode possible
- Internal memory for up to 20 files (with up to 100 values per file)
- Selectable measuring units: mm, inch
| Model |
readout |
range |
sensor diameter |
measuring frequency |
|
mm |
mm |
mm |
Mhz |
| TN 80-0.1US. |
0.1 |
0.75-80 |
6 |
7 |
| TN 230-0.1US. |
0.1 |
1.2-230 |
10 |
5 |
| TN 230-0.1US. |
0.1 |
3-300 |
14 |
2.5 |
| TN 80-0.01US |
0.01 |
0.75-80 |
6 |
7 |
| TN 230-0.01US. |
0.01 |
1.2-230 |
10 |
5 |
| TN 300-0.01US. |
0.01 |
3-300 |
14 |
2.5 |
|
 |
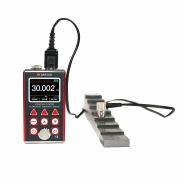
Multi-mode Ultrasonic Thickness Gauge MT660
The digital ultrasonic thickness gauge determines the thickness of a part or structure by accurately measuring the time required for a short ultrasonic pulse generated by a transducer to travel through the thickness of the material, reflect from the back or inside surface, and be returned to the transducer. The measured two-way transit time is divided by two to account for the down-and-back travel path, and then multiplied by the velocity of sound in the material.
Capable of performing measurements on a wide range of material, including metals, plastic, ceramics, composites, epoxies, glass and other ultrasonic wave well-conductive materials. Differnet transducer models are available for special application, including for coarse grain material and high temperature applications.
The velocity of sound through a substance is dependant upon its temperature. As materials heat up, the velocity of sound through them decreases. In most applications with surface temperatures less than about 100°C, no special procedures must be observed. At temperatures above this point, the change in sound velocity of the material being measured starts to have a noticeable effect upon ultrasonic measurement. At such elevated temperatures, it is recommended that the user perform a calibration procedure on a sample piece of known thickness, which is at or near the temperature of the material to be measured. This will allow the gauge to correctly calculate the velocity of sound through the hot material.
features
- Operating Temperature: -20 to 60 °C
- Relative Humidity <=90
- Multi-mode: Pulse-Echo mode (P-E mode) and Echo-Echo mode (E-E mode). In Echo-Echo mode, it can test the wall thickness eliminating paint or coating thickness.
- Wide measuring range: Pulse-Echo mode: (0.65 to 600)mm (in Steel). Echo-Echo mode: (2.5 to 100)mm
- V-Path correction to compensate the nonlinearity of the probe
- Color TFT display (320×240 TFT LCD) with adjustable backlight, allow the user to work at worksites with low visibility.
- Non-volatile memory can store 100 groups of test thickness. One hundred records max for each group.
- Two AA size alkaline batteries as the power source. Continuous operating period of no less than 100 hours (default brightness setting). Display Standby and Auto Power Off functions to save power.
- Bluetooth module
|
 |
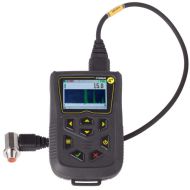
Multi-mode Ultrasonic Thickness Gauge Cygnus 4 +
The Cygnus 4PLUS is a compact multi-mode ultrasonic thickness gauge which features a graphical LCD display, simple to use sequential data logging and manual and automatic gain control.
Designed for the harshest of environments, with a simple to use keypad, intuitive menus and a colour LCD display which can be viewed in all lighting conditions.
The twin shot injection moulded enclosure has a soft but durable TPE outer skin which is comfortable to hold and protects against bumps while the hard internal shell offers maximum strength and environmental protection certified to the demanding US MIL STD 810G standard.
The unit still relies on Multiple-Echo to provide simple and accurate measurements, with the added benefit of Echo-Echo and Single-Echo using twin crystal probes for extreme corrosion. Echo-Echo for measurements on painted metals but with heavy back wall corrosion / pitting and Single-Echo for measurements on uncoated surfaces with heavy front face and/or back-wall corrosion and attenuative materials such as cast metals or plastics / composites.
- Measuring Modes: Multiple-Echo using 3 sound pulses to ignore coatings up to 20mm thick, Echo-Echo using 2 sound pulses to ignore coatings up 1mm thick, Single-Echo using 1 sound pulse.
- Materials: Sound velocities from 1 000 - 9 000 m/s
- Accuracy: ±0.1 mm (or 0.1% of thickness measurement, whichever is greatest, when calibrated in accordance with Cygnus Instruments calibration procedure.
- Resolution
- Multiple-Echo mode - 0.1 mm or 0.05 mm
- Single-Echo and Echo-Echo modes - 0.1 mm or 0.5 mm or 0.01 mm
- Single crystal probes: 6 mm - 5 MHz (S5A), 13 mm - 2.25 MHz (S2C, standard), 3.5 MHz (S3C) or 5 MHz (S5C), 19 mm - 2.25 MHz (S2D)
- Twin crystal probes: 5 mm - 7.5 MHz (T7A), 8 mm - 5 MHz (T5B, standard), 12 mm - 2 MHz (T2C, for attenuative materials, cast metals, plastics & composites)
- Measurement Range in Steel
- with single crystal probes: 1 - 250 mm
- with twin crystal probes in Single-Echo: 0.8 - 250 mm
- with twin crystal probes in Echo-Echo: 3 - 50 mm
- Connector: Twin Lemo 00
- Power: 3 x AA batteries
- Battery Life: 10 hours minimum
- Electronics: Dual channel pulser
- Display 2.4" VGA LCD
- Display Information: Thickness value and A-scan
- Size: 132 mm x 82 mm x 34 mm (W x H x D)
- Weight: 300 grams (inc. batteries)
- Operating Temperature: -10°C to 55°C
- Data Logging 500 000 measurement points, including A-scan (5000 readings per record, soft limit of 100 records)
|
 |
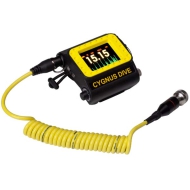
Wrist-Mountable Underwater Thickness Gauge Cygnus DIVE
The Cygnus DIVE, depth rated to 300 metres, is accurate, reliable and easy to use. The Cygnus DIVE is worn on the diver's forearm, availing an invaluable free hand while performing the thickness survey.
A large, very bright colour AMOLED display shows the thickness measurements in big numbers along with a live A-scan for verification. Power is supplied by a replaceable, rechargeable, Lithium-Ion battery pack that gives up to 11 hours continuous measurement. The ultrasonic probe is connected by a coiled double jacket cable and rugged locking connector. Now with the option of Single Echo and Echo-Echo Modes for use with a Twin Crystal Probe, ideal for use on extermely heavy corrosion & anchor chain.
Single Echo is for use on un-coated surfaces and Echo-Echo for use through paint up to 0.5mm thick. An optional data logging feature is available for storing up to 5000 measurements and A-Scans. CygLink v4. provides surface computer based viewing and data logging. The Topside Repeater unit with Video On-Screen Display option allows the thickness measurements to be overlaid onto the monitor screen / video recording of the survey. HelmetView provides a helmetmounted remote display of thickness measurements.
Kit Ref. 001-7210/2: Cygnus DIVE MK2 Ultrasonic Thickness Gauge (UTG), Probe S2C 2.25MHz 13 mm (1/2"), 2 rechargeable batteries, battery charger, screen protector, silicone grease, lanyard, spare probe knurled ring & membranes, membrane key, membrane couplant, steel test block, ultrasonic couplant, operation manual and carry case.
|
|
|


